Wednesday, August 28, 2013

Crop Circles

111cm X 162cm (43" X 63")
On-line I saw an aerial photo of crop circles. I've always enjoyed seeing them on a flight myself and I thought it would make an interesting quilt. I had a lot of greens left over from a quilt I made for my daughter and then started collecting some mustard/saffron colored prints along with browns. I tend to like scrap quilts with a color theme. I'll usually buy only a half a yard of any one fabric.
from buzzfeed.com


Hand applique is great for a take-a-long hand work project. For this one, I cut out the mustard squares (larger than their finished cut size would be) and used freezer paper circles for the greens. I always had something to applique (did a lot of them during my 30 minute lunch break at work). I put the finished ones on the design wall, then re-trimmed the squares and sewed them together with the narrow brown sashing, all this by machine. 
The reason for the 'larger than their finished cut size' and 're-trimmed squares', is because after handling the fabric to applique fraying can occur. I cut out the back of the appliqued circle, remove the freezer paper, then press and trim.
Close-up. 15cm blocks, .75cm sashing
I chose a random angle for the whole quilt to be. I didn't want a 45 degree placement. 
The border is random strips of the browns sewn together in .75cm and 1.5cm widths. I threw in some mustard pieces too. The strips are joined together with 45 degree seams. I carefully mitered the corners.

Back view
For the back I bought some extra wide high-quality muslin, (so no piecing) and hand dyed it with fiber reactive procion dye. I got lucky and picked the color I wanted without having to mix it.

I'm a hand quilter so after several months of quilting, it's done! I usually quilt in the evenings with a good light and the TV on. This quilt was small enough to take along to guild meetings to quilt there too.

Friday, June 7, 2013

Easy Bordered Napkins


 I've made a smaller version of the popular easy bordered baby receiving blanket (it's called a lot of different things). Using two coordinating fabrics you can whip up a set of four (or more) napkins in no time at all. They would of course make great gifts and since there are two layers are nicer than other cloth napkins. I think I'll even make some a little larger to have on hand to line a bread basket (or wrap a homemade loaf of bread to give as a gift), the list goes on.

For four napkins (finished at 15.5") you will need 2/3 yard of one fabric (the lighter on mine) and 40 inches (1.111 yards) of another fabric. The math goes like this if you'd like a different size: 

Finished size, less seam allowance (FS), inner square (IS) and back/border (BB)
Mine was: 16" (FS) - 4"= 12" (IS) and 16" (FS) + 4" = 20" (BB)

So for instance you wanted 20" napkins you would use a 16" square for the inner piece and a 24" square for the back/border piece. There is an 8" difference between the two squares, which makes a 2" border. 
Note: the 1/4" seams makes the finished size actually 1/2" smaller, if you want you can add 1/2" to your cutting sizes to allow for this.
One 12" square and one 20" square


Pinch centers, match and pin, right sides together. Sew 1/4" seam allowance across the top, starting and stopping 1/4" away from the ends of the smaller square.

Rotate one turn, pinch centers, match and pin center first. Pin out to the ends. Sew seam starting and stopping 1/4" from the ends of the smaller square. Rotate around and sew third side the same way. On the fourth side, leave about 4" open in the middle (reinforce the stop and start here).

It should look like this now. Press the seams out, line up the borders carefully before pressing the edges.

Press the corners down flat to make a crease. 

Close up of pressed corner

Open corner, pin (temporary), move backing fabric out of the way.

Re-pin across the fold. If you can't see the fold to sew on use a fabric pen or pencil to darken the line.

Sew the seam on the folded line. Sew all four corners.


Trim the mitered corner seams
Turn right sides out, carefully poke out corners. Press the corners first then the straight seams, then the whole napkin.
 
Choose thread and a fancy stitch, sew over the seams. This will also sew down the open part.


To use, give your napkins a fancy fold when you set the table. After washing you will have to give them a quick press, but they are so pretty you won't mind

Sunday, April 7, 2013

Hexagons

I'm thinking of my next quilt and feel that it will involve stripes and hexagons. I've started collecting striped fabrics and researching hexagon shapes. There are a lot of choices out there! Stay tuned for the results. 
Until then, here are some hexagon things I've made and some friends have made too.
Hexagons basted and ready to go
I use 22mm size papers (nearly 1"). The yellow plastic is for cutting out the fabric. See-thru for fussy cutting.


This is an alphabet decoration. Hand pieced and quilted, it was made to look like it came from an old quilt.


Made by Sue Marks. I use it!


Postcard by Sue Marks
Back of the postcard by Sue Marks. Mailed from England to Japan.


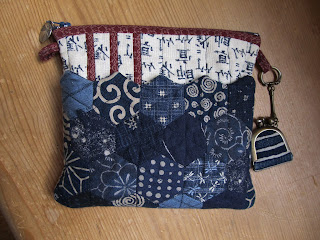
Sashiko, hand pieced and quilted by me
A little bag for the inside of the big one (by me)
Gorgeous hand pieced and quilted by Mariyln Locke. The back is all hexagons too.              

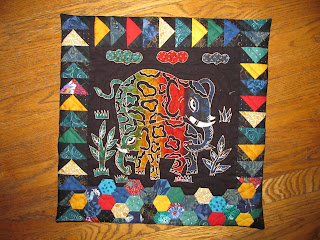
Pillow cover made by me for my mom. I used a batik panel, machine pieced geese and hand pieced hexagons. Hand quilted.
Pillow back. Used leftover hexagons
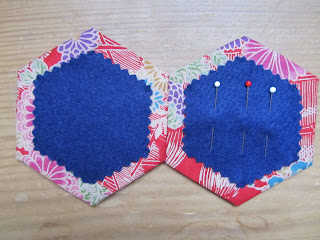
Needle case by me
Needle case inside
Key chain by me
The last two pictures are made from a method I learned from a lovely Japanese sensei (teacher) named Sachiyo Muraki. She has a unique method of quilt making using hexagons making the quilt reversible. I have an old book of hers and there is another out, Japanese Reversible Patchwork 2 that I've seen for sale on an etsy site: pomadour24.
All for now, I'm off to work on figuring out my stripes.

Friday, March 1, 2013

Round Robin Two

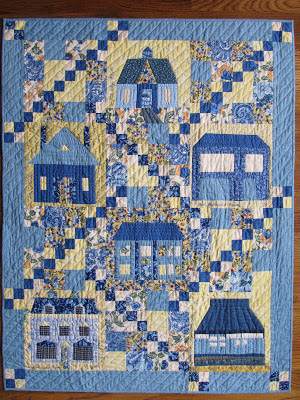
This little HOUSE QUILT (84cm X 109cm) was an easy round robin I did a few years ago with friends in my Tokyo quilt group. We each chose a theme and colors we wanted, then made blocks for each other. Of course my theme was houses and blue and yellow my colors. I like to get this one out in the spring to drape over a chair. 
The blocks were each 24cm square (a little less than 9 1/2").
I made the joining blocks


Copy of my house in Japan

Helen Ott's English House
JoAnn Smith's US House

Joan Wong's US House

Sue Marks's English House


Noriko Sugano's Japanese House

Pieced back, hand quilted


Friday, February 22, 2013

A Fish Circus

Just added a new pattern to my Craftsy site, suquilt. It's just a top now, but will one day be quilted.
I don't remember why I thought of it, maybe from looking at my husband's scuba pictures, although no real fish would look like mine. I've been into the mustard yellows and teals lately so they got used. (Scraps from a previous project plus some others.) 
I used some sashiko thread to create the freehand flow around the fishes. Embroidery thread could also be used.